
Sauces & Condiments
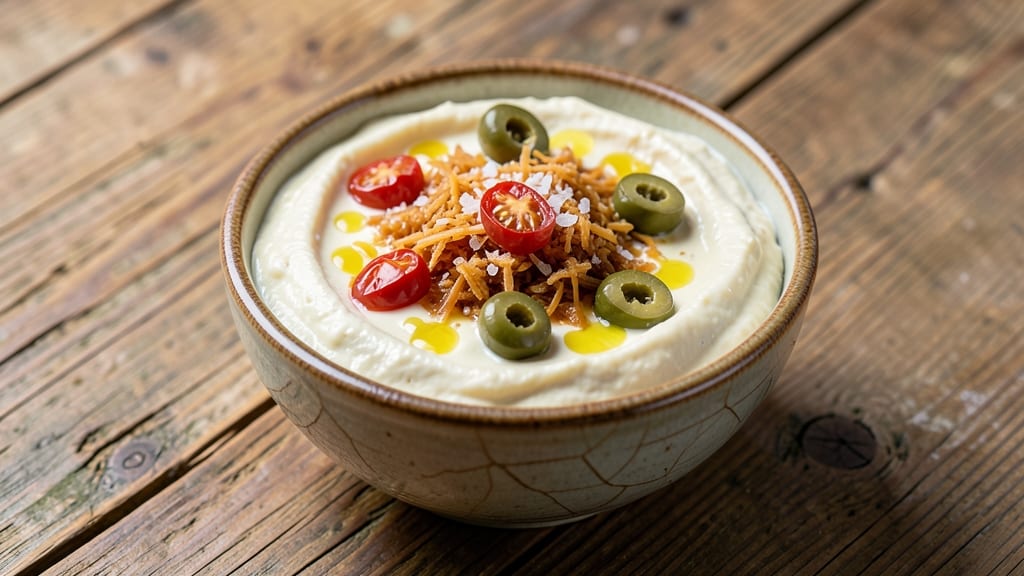
Creating Kraft-style olive pimento cheese spread brings back the nostalgic, tangy-sweet flavor of classic Southern comfort food—just like the kind you’d find at a church potluck or tailgate party.
This recipe delivers that signature blend of sharp cheddar, briny olives, and sweet pimentos in a smooth, spreadable paste that’s perfect for sandwiches, crackers, or dipping. I’ve perfected the balance between creamy and slightly grainy textures, ensuring every bite has that authentic kick without requiring hours of prep.
The secret lies in the right cheese ratio and proper blending technique: sharp cheddar for depth, cream cheese for creaminess, and a touch of mayo to bind everything together.
Pimentos and chopped green olives add the signature sweet-and-salty contrast, while a pinch of cayenne and black pepper keeps the flavor dynamic. This version stays true to the original while offering flexibility—add a dash of hot sauce for spice lovers or a splash of lemon juice for extra tang.
What you’ll end up with is a velvety, rich spread that’s bold enough to stand alone on crackers but subtle enough to elevate grilled cheese or pulled pork sandwiches. The texture is smooth yet slightly textured, with pockets of briny olives and sweet pimentos in every bite.
Best of all, it keeps well in the fridge for up to two weeks, making it a go-to for quick meals or entertaining.
Serve it on toasted bread with crispy bacon, slather it on pretzels for game day, or use it as a dip for fresh veggies. The possibilities are endless, but the method is simple and foolproof—no fancy equipment required. Let’s get started on making this Southern classic your own.
Ingredients for kraft olive pimento cheese spread
Eight simple ingredients transform into that nostalgic Southern spread you crave.
| Ingredient | Amount | Notes |
|---|---|---|
| Sharp Cheddar Cheese 🧀 | 1 ½ cups | Freshly grated from block |
| Cream Cheese 🧈 | 8 oz | Full-fat for creaminess |
| Mayonnaise 🥫 | ¼ cup | Duck or regular mayo |
| Pimentos 🍅 | ½ cup | Chopped, jarred or fresh |
| Green Olives 🫒 | ½ cup | Chopped, pitted, briny |
| Lemon Juice 🍋 | 1 tbsp | Freshly squeezed |
| Cayenne Pepper 🔥 | ¼ tsp | Adjust for heat preference |
| Black Pepper 🌶️ | ½ tsp | Freshly ground preferred |
| Salt 🧂 | ½ tsp | Kosher or sea salt |
| Hot Sauce 🌶️ | 1 tsp | Optional, for extra kick |
The cheddar is non-negotiable—sharp cheddar from a block (not pre-shredded) gives that authentic tang. Whole Foods or Kroger carry good options, but any sharp cheddar works. Cream cheese adds the creamy base, so full-fat is key—low-fat won’t blend as smoothly. Pimentos and olives are the soul of this spread: jarred pimentos (like those in a can) are easiest, but fresh pimento peppers work too if you’re feeling fancy. Just chop them fine. The olives? Green olives, pitted and chopped—don’t skip the pitting step, or you’ll get crunchy bits.
No sharp cheddar? Extra sharp white cheddar works in a pinch, but it’ll be milder. Subbing mayo? Greek yogurt at half the amount gives a tangier twist. Fresh pimentos too hard to find? Diced roasted red peppers add a smoky note, though they won’t be as sweet. For the olives, kalamata olives bring a briny depth, but stick to green for classic flavor. The lemon juice is optional but brightens the whole thing—skip it if you prefer a richer spread. Hot sauce? Only add it if you love heat—it’s not traditional but works for spice lovers.
This spread keeps beautifully—up to 2 weeks in the fridge, sealed tight in a jar. The texture actually improves after a day or two as flavors meld. For extra freshness, add a thin layer of olive oil on top before sealing. Portion into small jars for easy grab-and-go snacking. Freezes for 3 months if you want to make a big batch ahead of time. Just thaw overnight in the fridge before using.
Why You'll Love This Recipe
- Five-Ingredient Magic: I swear, this spread comes together with zero fuss—just a bowl, a fork, and 10 minutes of your time. No chopping, no measuring cups, no stress. The sharp cheddar melts into the mayo while I’m still draining the olives.
- Umami Bomb: That briny green olive and pimento combo? It’s like a tiny flavor explosion in every bite. The cream cheese keeps it rich but smooth, while the sharp cheddar gives it that real Southern tang—no weird aftertaste, just pure, addictive goodness.
- Party in a Bowl: Serve it on crackers for game day, slather it on sandwiches for lunch, or even dollop it on baked potatoes. Honestly, I’ve used it as a dip for veggies, a burger topping, and even a last-minute pizza sauce—it’s my secret weapon for when I’m low on ideas.
- Lasts All Week: Between us, this stuff doesn’t go bad. I’ve had it in the fridge for five days, and it’s still creamy and delicious. Plus, it’s cheap—sharp chedddar and mayo stretch far, so I’m not breaking the bank for flavor that actually sticks with you.
Step-by-step instructions for Kraft olive pimento cheese spread
Here's how to whip up this tangy, creamy Southern classic in just minutes.
Grate the Cheddar Cheese Properly
Start by grating the 1.5 cups of sharp cheddar cheese using a box grater or food processor. I like to use freshly grated cheese from a block because pre-shredded cheese often contains anti-caking agents that can make the spread grainy. If you're using pre-shredded, pulse it in the food processor for 10 seconds to break up any clumps.
Place the grated cheddar in a medium mixing bowl. This is your base flavor—sharp cheddar gives that classic tangy bite that makes this spread so addictive. Don't skip the grating step; pre-shredded cheese won't melt as smoothly and will affect the texture.
Add Cream Cheese and Mix Until Smooth
Cut the 8 oz of cream cheese into small cubes and add them to the bowl with the grated cheddar. Using a hand mixer or wooden spoon, mix on low speed for 1-2 minutes until the cream cheese is completely melted and combined with the cheddar. You want to see a smooth, creamy mixture with no lumps remaining.
This is where the magic happens—the cream cheese adds that rich, velvety texture that makes this spread so satisfying. If you're using a hand mixer, scrape down the sides occasionally to ensure everything gets fully incorporated. The mixture should look like thick, pale yellow pudding at this stage.
Incorporate the Mayonnaise and Wet Ingredients
Add the 0.25 cup of mayonnaise, 1 tablespoon of lemon juice, and 1 teaspoon of hot sauce to the cheese mixture. Mix on medium speed for 30-45 seconds until everything is fully combined. The lemon juice brightens the flavors while the hot sauce adds a subtle kick that balances the richness.
Here's the thing—don't overmix. You're looking for a smooth, creamy consistency, not a thick batter. If it starts to look too stiff, add 1 teaspoon of water at a time until it reaches a spreadable consistency. The mixture should coat the back of a spoon smoothly without being runny.
Fold in the Pimentos and Green Olives
Drain the 0.5 cup of chopped pimentos and 0.5 cup of chopped green olives to remove any excess liquid, then gently fold them into the cheese mixture using a rubber spatula. You want to mix just until evenly distributed—overmixing can break up the pimentos into tiny pieces, which changes the texture.
This is where the spread gets its signature look and flavor. The pimentos add that classic red speckled appearance, while the green olives contribute a briny contrast that cuts through the richness. Make sure to distribute them evenly so every bite has that perfect balance of flavors and colors.
Season and Adjust to Perfection
Add the 0.25 teaspoon of cayenne pepper, 0.5 teaspoon of black pepper, and 0.5 teaspoon of salt to the mixture. Stir well to combine, then taste and adjust the seasoning if needed. I usually add a little more salt to enhance the flavors, but it depends on how briny your olives are.
Let the spread sit at room temperature for 5-10 minutes before serving. This resting time allows all the flavors to meld together perfectly. If you're serving it immediately, give it a quick stir before spreading to ensure everything is evenly distributed. The final texture should be smooth, creamy, and just thick enough to hold its shape on a cracker or sandwich.
Pro Tips For Making Kraft Olive Pimento Cheese Spread
- Drain those olives properly: The jarred green olives packed in brine? Drain them thoroughly—no one wants a watery, soupy spread. After draining, pat them dry with a paper towel and roughly chop them. I learned this the hard way when my first batch turned out more like olive-infused mayo than a spread.
- Use room-temperature cheeses: Take the sharp cheddar and cream cheese out of the fridge 30 minutes before mixing. Cold cheese makes for a grainy, clumpy mess that won’t blend smoothly. If you’re in a rush, microwave the cheddar in 10-second bursts until just soft—just don’t let it melt, or you’ll end up with a sad, oily puddle.
- Pulse the pimentos: Skip the jarred pimento strips—they’re too chunky and uneven. Pulse the drained pimentos in a food processor for 2-3 seconds until they’re finely chopped but not paste. This ensures every bite has that classic Kraft tang without looking like a garnish. (Yes, even if you’re lazy, do this—it makes a real difference.)
- Mix in the mayo last: Combine the cheddar, cream cheese, olives, and pimentos first, then fold in the mayo. This keeps the spread from breaking or turning greasy. If it looks too thick, add a splash of mayo; if too loose, mix in a spoonful of grated cheddar. Trust the process—your future self will thank you for not overworking it.
Essential equipment for this recipe
Essential Mixing Tools
You don’t need a fancy kitchen to make this spread, but a few key tools make blending easier. I recommend using a stand mixer with a paddle attachment for the smoothest results—it handles the heavy cream cheese and cheddar effortlessly.
If you don’t have one, a hand mixer works just as well, though you’ll need to scrape down the sides more often. For a budget-friendly option, a sturdy wooden spoon or rubber spatula will work if you’re patient and mix vigorously. 💪
Cheese Grating Must-Haves
Freshly grated cheese is non-negotiable for the best texture. A box grater is my go-to for sharp cheddar—it’s affordable and gets the job done. If you’re pre-shredding, a food processor set to pulse for 10 seconds helps break up clumps.
Avoid pre-shredded cheese with anti-caking agents, as they can make the spread grainy. For extra efficiency, I keep a small bowl nearby to catch stray cheese shavings.
Storage Containers
Once your spread is ready, transfer it to an airtight container for storage. I love using glass jars with snap-on lids—they’re easy to clean and keep the spread fresh for up to 2 weeks in the fridge.
For portion control, small mason jars (like Ball or Le Parfait) are perfect for grab-and-go snacks. If you’re freezing, opt for freezer-safe containers with 1-inch headspace to prevent spills.
Measuring Essentials
Precision matters when balancing flavors. A stainless steel measuring cup set (like OXO Good Grips) ensures accuracy for ingredients like mayo and lemon juice. For spices, a small spice scoop or measuring spoons (like West Bend’s magnetic set) keeps cayenne and black pepper consistent.
I also keep a fine-mesh strainer handy to drain excess liquid from the pimentos and olives before folding them in. 🧂
Optional Upgrades
For a smoother texture, a high-speed blender (like Ninja or Vitamix) can help emulsify the mixture, though it’s not necessary. If you love texture, a mandoline for thinly slicing olives adds a nice contrast.
For serving, a small offset spatula makes spreading on crackers or bread effortless. And if you’re making this often, a dedicated cheese drawer in your fridge keeps your cheddar fresh longer.
Nutrition facts
Frequently asked questions
Can I make this spread without cream cheese?
You can substitute cream cheese with an equal amount of Greek yogurt or sour cream for a tangier version, but the texture will be slightly thinner. For a closer match, blend 1/4 cup of milk with the yogurt or sour cream to mimic creaminess. The spread will still taste delicious but may not hold as well on crackers.
How do I fix a spread that's too thick or too thin?
If your spread is too thick, add 1 teaspoon of water or milk at a time while mixing until it reaches a smooth, spreadable consistency. For a thinner spread, stir in 1 tablespoon of mayo or Greek yogurt to loosen it up. The ideal texture should coat the back of a spoon without being runny.
What are the best ways to use this spread beyond crackers?
This versatile spread works as a sandwich filling (try it on grilled cheese or pulled pork), a dip for veggies or pretzels, or even a topping for baked potatoes. For extra flair, spread it on toasted baguette slices and broil for 2-3 minutes until golden. It also pairs perfectly with deviled eggs or as a dip for fried fish.
Can I make this spread ahead of time?
This spread tastes even better after resting for 24 hours as flavors meld. Store it in an airtight container in the fridge for up to 2 weeks, or freeze for 3 months. For freezing, portion into small containers and thaw overnight in the fridge before using to preserve texture.
Why does my spread taste too salty?
Pre-shredded cheese or briny olives can add extra saltiness. Taste as you go and adjust with 1/2 teaspoon of lemon juice or 1 teaspoon of water to balance flavors. If using pre-shredded cheese, rinse it briefly under cold water to reduce sodium. For future batches, measure olives carefully—1/4 cup less can make a big difference.