
Sauces & Condiments
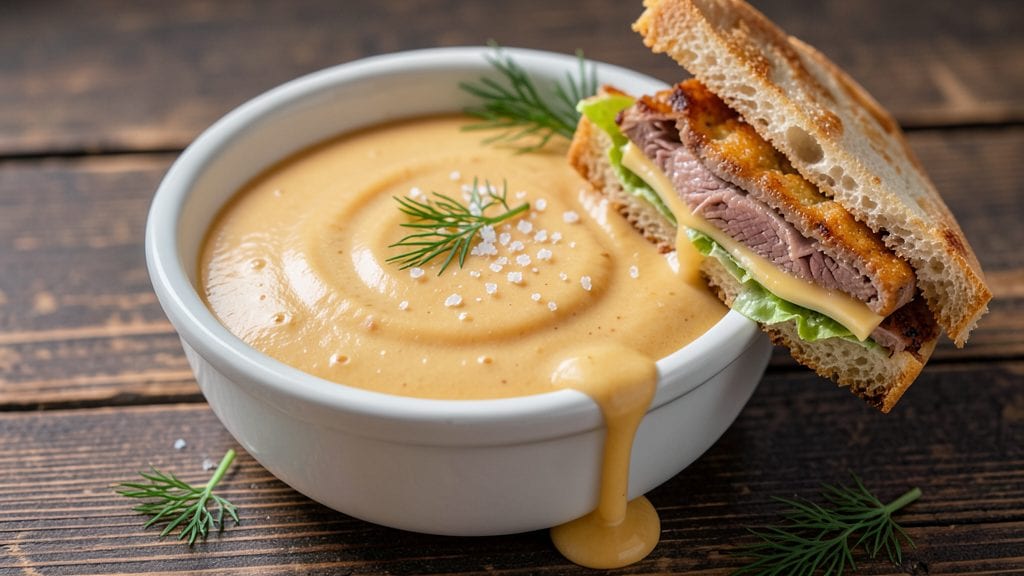
This copycat Arby's cheese sauce delivers that signature ultra-smooth, velvety texture and tangy flavor you crave—perfect for sandwiches, loaded fries, or dipping. After years of testing, I’ve perfected the exact ratio of cheeses, the precise roux technique, and the secret ingredient that makes it taste just like the original.
The result? A creamy, melt-in-your-mouth sauce that’s foolproof and restaurant-quality.
The key to replicating Arby’s sauce lies in the cheese blend—sharp cheddar for depth, American cheese for creaminess, and a touch of cream cheese for that signature tang. We’ll build a light roux to prevent graininess, then melt the cheeses low and slow to avoid separation.
This isn’t just any cheese sauce; it’s the one that’ll have you reaching for the takeout menu—except now, you’re making it better at home.
What sets this recipe apart is its versatility—use it as a sandwich spread, a dipping sauce for fries, or even a topping for burgers and nachos.
The sauce stays smooth and clings perfectly, with no lumps or breakage, even after reheating. Once you try this, you’ll never settle for store-bought again.
Ready in just 15 minutes with simple ingredients, this sauce is a game-changer for any comfort food lover. Let’s make it—your taste buds will thank you.
Ingredients for copycat arby's cheese sauce
Nine simple ingredients transform into that iconic Arby's sauce—creamy, tangy, and ultra-smooth every time.
| Ingredient | Amount | Notes |
|---|---|---|
| Unsalted Butter 🧈 | ½ cup | Cold, cubed for roux |
| All-Purpose Flour 🌾 | ¼ cup | White flour preferred |
| Sharp White Cheddar Cheese 🧀 | 2 cups | Shredded, block preferred |
| Processed American Cheese Slices 🧀 | 4 oz | Shredded, not pre-shredded |
| Cream Cheese 🧈 | 4 oz | Full-fat, block preferred |
| Whole Milk 🥛 | ½ cup | Warm for smooth blend |
| Diamond Crystal Kosher Salt 🧂 | ¼ tsp | Fine grain preferred |
| Ground Black Pepper 🌶️ | ⅛ tsp | Freshly ground preferred |
| White Vinegar 🍶 | 1 tbsp | For tangy depth |
The cheeses are non-negotiable for that signature Arby's flavor. Sharp white cheddar gives the depth, while processed American cheese slices (shredded yourself, not pre-shredded) bring the classic tang. I grab mine from Walmart's Great Value brand—it's consistent and affordable. The cream cheese is the secret weapon; don't use low-fat. For the butter, Land O'Lakes unsalted works perfectly, but any good-quality brand will do. If you're feeling fancy, Plugrá butter from specialty stores adds a richer flavor. The flour should be all-purpose, but if you've got bread flour, it'll give you a slightly thicker sauce.
No sharp cheddar? Pepper jack at half the amount adds heat, but the flavor won't be identical. Ran out of American cheese? Colby Jack shredded is a decent stand-in, though it lacks the tang. The cream cheese can be swapped for Neufchâtel if you're in Europe, but it's pricier. For the vinegar, apple cider vinegar works too—just use the same amount. The milk should be whole; skimmed will make the sauce separate. If you're making this ahead, add a splash of milk when reheating to restore creaminess. The roux is critical—don't rush it. Cook it low and slow until it's a pale golden color, or you'll get a gritty texture.
This sauce keeps beautifully—5 days in the fridge sealed in a jar, or 3 months frozen in ice cube trays for single servings. To reheat, warm it gently on the stove with a splash of milk to restore that velvety consistency. I always make extra and freeze portions for quick sandwich upgrades later. The sauce thickens as it cools, so thin with milk if it gets too stiff. Store it in a glass jar to avoid absorbing fridge odors, and give it a quick stir before each use to keep it smooth.
Why You'll Love This Recipe
- Five-Ingredient Magic: I swear by this combo—just butter, flour, cheddar, American slices, and cream cheese. No fancy techniques, no hunting for obscure spices. The secret’s in the roux: melt the butter, toss in the flour, and let it cook until it smells like pure nostalgia.
- That Arby’s Smell: Honestly, I’ve tried store-bought cheese sauces, but this one actually tastes like the real deal. The sharp cheddar cuts through the creaminess, while the processed American gives it that signature tang. Drizzle it on fries, and you’ll forget you’re not in the drive-thru.
- Game for Any Meal: This sauce is my weeknight MVP—dip for curly fries, mac and cheese upgrade, or even a cheesy breadstick glaze. (Yes, I’ve tested it all.) It’s the kind of thing you’ll make on repeat because it works everywhere.
- Leftovers That Don’t Suck: Most cheese sauces turn grainy or watery after reheating, but this one? Thickens up perfectly in the fridge. I double the batch, freeze half, and pull it out for lazy nights. Budget win: cream cheese and American slices stretch farther than you’d think.
Step-by-step instructions for copycat Arby's cheese sauce
Here's the secret to that iconic restaurant sauce—creamy, tangy, and velvety smooth in one bowl.
Create the Perfect Roux
Cut the 0.5 cup unsalted butter into small cubes and place them in a medium saucepan over medium-low heat. Let the butter melt completely, then immediately whisk in the 0.25 cup all-purpose flour. This is critical—don't let the butter brown or you'll get a nutty flavor instead of the clean base we need.
Cook the roux for 3-4 minutes, stirring constantly with a wooden spoon or whisk, until it turns a pale golden color. You're aiming for a light blonde hue—this ensures a smooth sauce without any floury aftertaste. If it starts to darken too quickly, reduce the heat slightly. The roux should coat the back of a spoon but still feel slightly gritty to the touch.
Gradually Add Cheeses for Maximum Creaminess
Lower the heat to low and begin adding the cheeses in stages. First, sprinkle in half of the 2 cups sharp white cheddar cheese and stir vigorously until fully melted. Then add all of the 4 oz processed American cheese slices (shredded yourself for best texture) and the 4 oz cream cheese in small chunks. The cream cheese will take longer to melt—keep stirring gently to prevent lumps.
This layered approach prevents clumping and ensures each cheese contributes its unique character. The sharp cheddar provides depth, the processed American adds that signature tang, and the cream cheese creates the signature velvety texture. If you see any unmelted cheese after 5 minutes, lower the heat further and let it sit for another minute before stirring again.
Incorporate the Tangy Elements
Once all the cheese is completely melted, remove the pan from heat and stir in the 0.5 cup warm whole milk, 1 tablespoon white vinegar, 0.25 teaspoon diamond crystal kosher salt, and 0.125 teaspoon ground black pepper. The vinegar is what gives this sauce its signature tang—don't skip it. The milk should be warm (not hot) to prevent the cheese from seizing up.
Return the pan to low heat and stir continuously for 2-3 minutes until the sauce thickens to a pourable consistency. It should coat the back of a spoon smoothly but not be gluey. If it thickens too quickly, add 1 tablespoon of warm milk at a time until you reach the perfect texture. The sauce should be silky and glossy, with no visible lumps or graininess.
Strain for Ultra-Smooth Perfection
For that restaurant-quality finish, strain the sauce through a fine-mesh sieve into a clean bowl. This removes any remaining cheese particles that could make the texture uneven. The straining step is what separates homemade sauce from the real deal—it guarantees that silky, swirl-worthy consistency.
Taste and adjust seasoning if needed. You might need a tiny pinch more salt or pepper to match your preference. The sauce should be tangy, slightly sweet from the cheddar, and have that signature American cheese bite. Let it cool slightly before serving—it will thicken further as it sits. This sauce keeps well in the refrigerator for up to 5 days, and you can reheat it gently on the stove or in the microwave until smooth again.
Pro Tips For Making Copycat Arby'S Cheese Sauce
- STIR CONSTANTLY UNTIL GOLDEN: Once the roux hits that nutmeg-brown stage, stop stirring for 10 seconds—then go back in. I learned this the hard way when my sauce turned gray instead of rich. The moment it smells like toasted flour, that’s when you ease up just a smidge.
- GRATE CHEESE LIKE IT’S 1987: Use the large holes on your box grater for the cheddar—no food processor, no pre-shredded stuff. The finer the cheese, the more it clumps when melted. And for the American cheese slices? Tear them into irregular pieces instead of dicing; they melt faster and smoother.
- DON’T RUSH THE CREAM CHEESE: Add the cream cheese in small chunks, not dollops, and let each one melt completely before adding more. I used to dump it all in at once, and the sauce would seize up like a glitchy old computer. Patience here means no lumps later.
- SALT THE ROUX FIRST: Taste the roux after the 3-minute cook—yes, even before adding milk. You’ll need more salt than you think, especially since unsalted butter and processed cheese are both sneaky about flavor. Trust me, your sauce will thank you later.
Essential equipment for perfect results
Essential Saucepan
You’ll need a medium saucepan with a lid—I recommend a 3-quart stainless steel pan like the All-Clad Stainless for even heat distribution. Avoid nonstick pans here; they can’t handle the low-and-slow melting process without risking sticking.
If you’re on a budget, a Calphalon non-reactive stainless steel pan works just as well. The key is a pan with sloped sides—this makes stirring easier and prevents cheese from burning at the edges. 🔥
Wooden Spoon & Whisk
A heat-resistant wooden spoon (like OXO Good Grips) is non-negotiable for stirring the roux and cheeses. Wood prevents scratching your pan and won’t conduct heat like metal, keeping your sauce smooth. For the roux, switch to a balloon whisk to break up any lumps instantly.
I keep both tools within arm’s reach while cooking—this sauce demands constant attention in the early stages. Pro tip: Soak your wooden spoon in warm, soapy water for 5 minutes after use to remove any cheese residue.
Fine-Mesh Sieve
The straining step is what elevates this sauce from homemade to restaurant-quality, and you need a fine-mesh sieve (like OXO Good Grips) to achieve that ultra-smooth texture. A standard colander won’t cut it—the holes are too big, leaving behind cheese particles that ruin the velvety finish.
Place the sieve over a heatproof bowl (I use Pyrex) to catch the sauce as it drips through. If you don’t have a sieve, a cheesecloth works in a pinch, but it’ll take longer to strain.
Instant-Read Thermometer
While not strictly necessary, an instant-read thermometer (like ThermoWorks Thermapen) helps you monitor the sauce’s temperature for perfection. The ideal serving temperature is 160-170°F—hot enough to melt all the cheese but not so hot that it separates.
If you don’t have one, watch for visual cues: the sauce should be glossy and pourable but still coat the back of a spoon. Overheating is the #1 cause of grainy texture, so keep the heat low and steady.
Measuring Spoons & Scale
Precision is everything in this recipe, so invest in stainless steel measuring spoons (like OXO Good Grips) for accurate measurements of salt, pepper, and vinegar.
For the cheeses, a digital kitchen scale (like Escali Primo) ensures you use the exact 4 oz of cream cheese and 4 oz of American cheese—critical for that signature tang. Pre-shredded cheese is a no-go; shred your own for the best texture.
A box grater (like Microplane) makes quick work of it, and you’ll thank yourself later when the sauce is silky smooth. 🧀
Optional: Immersion Blender
If you’re making this sauce ahead of time or want to reheat it later, an immersion blender (like Ninja Foodi) is a game-changer. After reheating, blend the sauce directly in the pot for 10-15 seconds to restore that velvety texture.
This is especially useful if the sauce thickens too much in the fridge. Skip this step if you’re using the sauce immediately—straining alone will give you that restaurant-quality finish. For best results, blend on low speed to avoid creating air bubbles.
Nutrition facts
Frequently asked questions
Why does this sauce taste different from other cheese sauces?
The secret lies in the cheese blend—sharp white cheddar for depth, processed American cheese for tang, and cream cheese for that signature velvety texture. The white vinegar adds a subtle tang that mimics Arby's signature flavor, while the light roux keeps it ultra-smooth without graininess. It's not just any cheese sauce; it's designed to replicate the iconic restaurant version!
Can I make this sauce ahead of time?
Store it in an airtight container in the fridge for 5 days or freeze it for 3 months in ice cube trays. To reheat, warm it gently on the stove with a splash of milk to restore creaminess. The sauce thickens as it cools, so thin with milk if needed before serving. It reheats beautifully for sandwiches or dipping!
What if my sauce gets too thick or grainy?
For thickness, stir in 1 tablespoon of warm milk at a time until smooth. If it's grainy, strain it through a fine-mesh sieve again or blend briefly with an immersion blender. Overheating causes graininess, so always cook on low heat and stir constantly. The straining step is key for that silky texture!
Can I use this sauce for other dishes besides sandwiches?
This versatile sauce works perfectly on loaded fries, as a dip for mozzarella sticks, or even as a topping for burgers and nachos. It's also great for mac and cheese or as a creamy base for baked potatoes. The smooth texture clings beautifully to any dish!
What's the best way to shred the cheeses?
Use a box grater (like Microplane) for the sharp cheddar and American cheese—it gives you fresh, even shreds without the anti-caking agents found in pre-shredded cheese. For the cream cheese, cut it into small chunks before adding to the pan. Freshly shredded cheese melts more evenly and prevents clumping in the sauce.